Wazbom Blastajet
I said that one of my New Year's resolutions was to start posting some miniature painting stuff, and as its now been three months, I figured it was probably time...
Orks are fun models, and I think they have more 'character' than any of the other 40k factions, but painting on Ork army generally means painting lots and lots and lots of pretty similar Boyz, with a bit of variation coming from painting Burnas (ie. Boyz with flamethrowers) and Lootas (ie. Boyz with big deffguns).
To be honest, having painted about 30-40 Boyz of various flavours, I'm pretty bored with them - I still like the character models that I can spend a bit more time on, and I do really like painting ork flesh (green skin is much more forgiving than trying to make human skin look like human skin), but all the clothes and weapon details get a bit boring when you're looking at dozens of them, and although there are enough different parts to create some variety in the models, there are only so many times you can paint the same head/torso/legs before it starts to get boring.
And at the end of the day, I like painting models - but paint an army means that you aren't so much painting 20 individual boyz - you're painting a big mob of boyz that are supposed to be intimidating because of their sheer numbers. In the game, when you're watching a pack of 20 of them advance towards you, you aren't going to be particularly worried about 20 BS5 shooting attacks, but if those 20 boyz make a successful charge and you realise that they get an extra attack from the 'green tide' rule (if there are 20 or more of them), plus an extra attack if they are carrying Choppas, and you're suddenly looking at 60 dice rolls for their WS3 melee attacks, its a bit different... So, making every individual one look as good as you can (ie. the way I like to paint) doesn't really work all that well.
But I got my son one of the plane models for his birthday last year, which he built and assembled himself (with me watching over him, trying my very best to keep my hands to myself - this was going to be his entry for a school thing, so it was very important to me that it was entirely 'his work'), and also got his hands on my airbrush to apply a layer of primer (Vallejo Mecha black primer, diluted about 50/50 primer to deionised water). He didn't have time to give it the 'proper' paint job for the school thing though, so it then sat around for a few months without getting any attention before I decided that it would be a fun project to try out the new airbrush that I got for Christmas.
What I was aiming for was a dirty, orky looking thing - my son's army is Snakebites, which is supposed to mean a brown colour scheme, but also the Ork klan least interested in technology. I like to have a story for my models - even if its only in my head - and figured that this meant that a Snakebite Mek would be less likely to be supplying a load of weapons and vehicles for the other Boyz, and more likely to be knocking up things for their own use with whatever bits and pieces they found on the battlefield. So, my idea was that this would be a camo pattern brown wreck of a plane that had been recovered, and somehow made to fly again.
So - I started with a coat of GW Rhinox Hide (a nice, dark brown with excellent coverage), a coat of matte varnish to protect it, and a coat of Vallejo Chipping Medium - all applied with an airbrush.
What the chipping medium does is provide a soft undercoat that the next layers of paint sit on top of. Later on, you can 'attack' the paint by first wetting it (which 'activates' the layer of chipping medium under the paint), then distressing it (I used a toothpick for some smaller scratches, and an old toothbrush for some bigger areas of damage/weathering) - the top layers of paint will flake away, leaving the Rhinox Hide coat underneath the varnish visible.
Once the varnish was dry, I then gave it a more-or-less all over coat of Mournfang Brown (the darker brown that you can see below), then masked off some areas with a combination of Tamiya masking tape, cling film and blu-tac to make a rough camo pattern, then airbrushed what was exposed with XV-88 (the lighter brown.)
Probably as a result of the chipping medium, some of the paint got lifted off by the tape/blu-tac, so I used a brush to touch them up with the 'top' colours again. I also tested out whether the chipping medium was going to work by wetting the wing on the right side of the picture below and giving it a bit of a scratch with a toothpick (all going from front to back, trying to make it look like scratches that had been picked up in flight).
At about this point, I remembered to start taking some photos...

Camo pattern down, with some ‘test’ weathering on one wing
My plan had been to add a third colour to the camo pattern (I had some Steel Legion Drab thinned down and ready to spray), but I didn't want to risk pulling more paint off with the masking process and thought that the two colours I had looked really good on their own, so I left it as it was.
That covered off the base coat for all the 'painted' areas of the model- next came the metallic parts. Basically, this was just a simple coat of Leadbelcher (applied with a brush), with a few bits of warplock bronze here and there to break it up, and Balthasar Gold for the Kustom Force Field (the bit sticking up in the middle of the fuselage, behind the cockpit.) I also gave a coat of black (Vallejo Model Colour) to the parts that I hadn't yet picked a colour for - the 'nozzles' on the back, and the cones on the front of the wing tips and fuselage.

The pilot and cockpit parts were assembled and painted separately, and glued in at this point. Nothing particularly special - a standard Waagh Flesh base/Biel Tan Green wash/Warboss Green highlight for the skin, black/Leadbelcher/Nuln oil for the metallics, and some Mephiston red and Teclis blue for the wires attached to his helmet. (I love the idea that this Mek has built his own plane and literally plugged his brain into it, so I wanted to make the wires as prominent as possible.) I also deliberately left some of the metallic colour visible - as though the wires are sitting on top of a big metal 'thing' - but I'm not sure how happy I am with the results and might touch this up with some more colours later on.
For the head/body connection, I think we probably didn't trim something as well as we could have done when we were building it- the head felt like it was slightly further forwards than it should have been (I'm not sure that its actually touching, but you can't see a gap), but the pose looked OK - if anything, like he was leaning forwards and really getting into attacking whatever it is that he's attacking, so I just went with it.

A nice clean, base coated mode… Maybe too clean…
At this point, I let loose with a toothpick, a toothbrush and some water, and got to dirtying up the nice, clean plane that I had created.
Better!
There were a couple of patches where I felt that I'd overdone it (maybe most notably on the left wing), so I added some more of the 'top' paint colours using a piece of sponge (to keep with the 'chipped' look, not completely cover the weathering, and not leave any brush strokes or straight edges.) There were also a few parts where I must have either missed out with the varnish coat or maybe went too thin with the primer, where the 'distressing' pulled all the paint off, with some of the bottom layer of grey plastic showing. Where I spotted these, I just went over with the top colours again.
Also with the sponge, I added a very small amount of Leadbelcher around the distressed areas - the idea being that I wanted it to look like the paint had come away some time ago, the bare exposed metal beneath had mostly corroded but that there were a few spots of bare metal still visible. Basically, I wanted to make it feel like it was metal, without covering the whole thing in metallic paint. This is probably most visible on the leading edges of the wings (where I figured any layers of rusted metal would be most likely to get knocked off in flight).
I also added a few patches of Rhinox Hide with the sponge, with the idea of adding some variation in the textures and hitting some areas that I thought would be likely to be exposed to the elements, but trickier to get to with my toothbrush/toothpick.
With the touch-ups complete, I then gave the metallic parts a coat of Nuln Oil, and the rest a coat of Agrax Earthshade. I probably went a bit heavier with the Agrax Earthshade than I should have done (you can see where there was some pooling around the front of the wing on the left hand side of the picture that I'm not really happy with), but the general idea was to turn it from a 'chipped, but still oddly clean' look to a dirtier, grungier look of a thing that has been built by an Ork Mek, probably patched up when its taken some serious damage, but not really looked after. (I think the Ork idea of washing a plane is probably to fly it in a fight when its raining.) I also added a little bit of Typhus Corrosion along the panel lines of the wings and fuselage to add some more definition and grime.
I also figured that I was finished with the pilot and cockpit details, and glued the windshield piece into place. (I probably should have done this a little earlier, so I could have done the metallic frames on the window at the same time as the frame around the edge of the cockpit and make them look more conistent, but I wasn't sure that I wanted to make it hard to get a brush into the cockpit later on.)

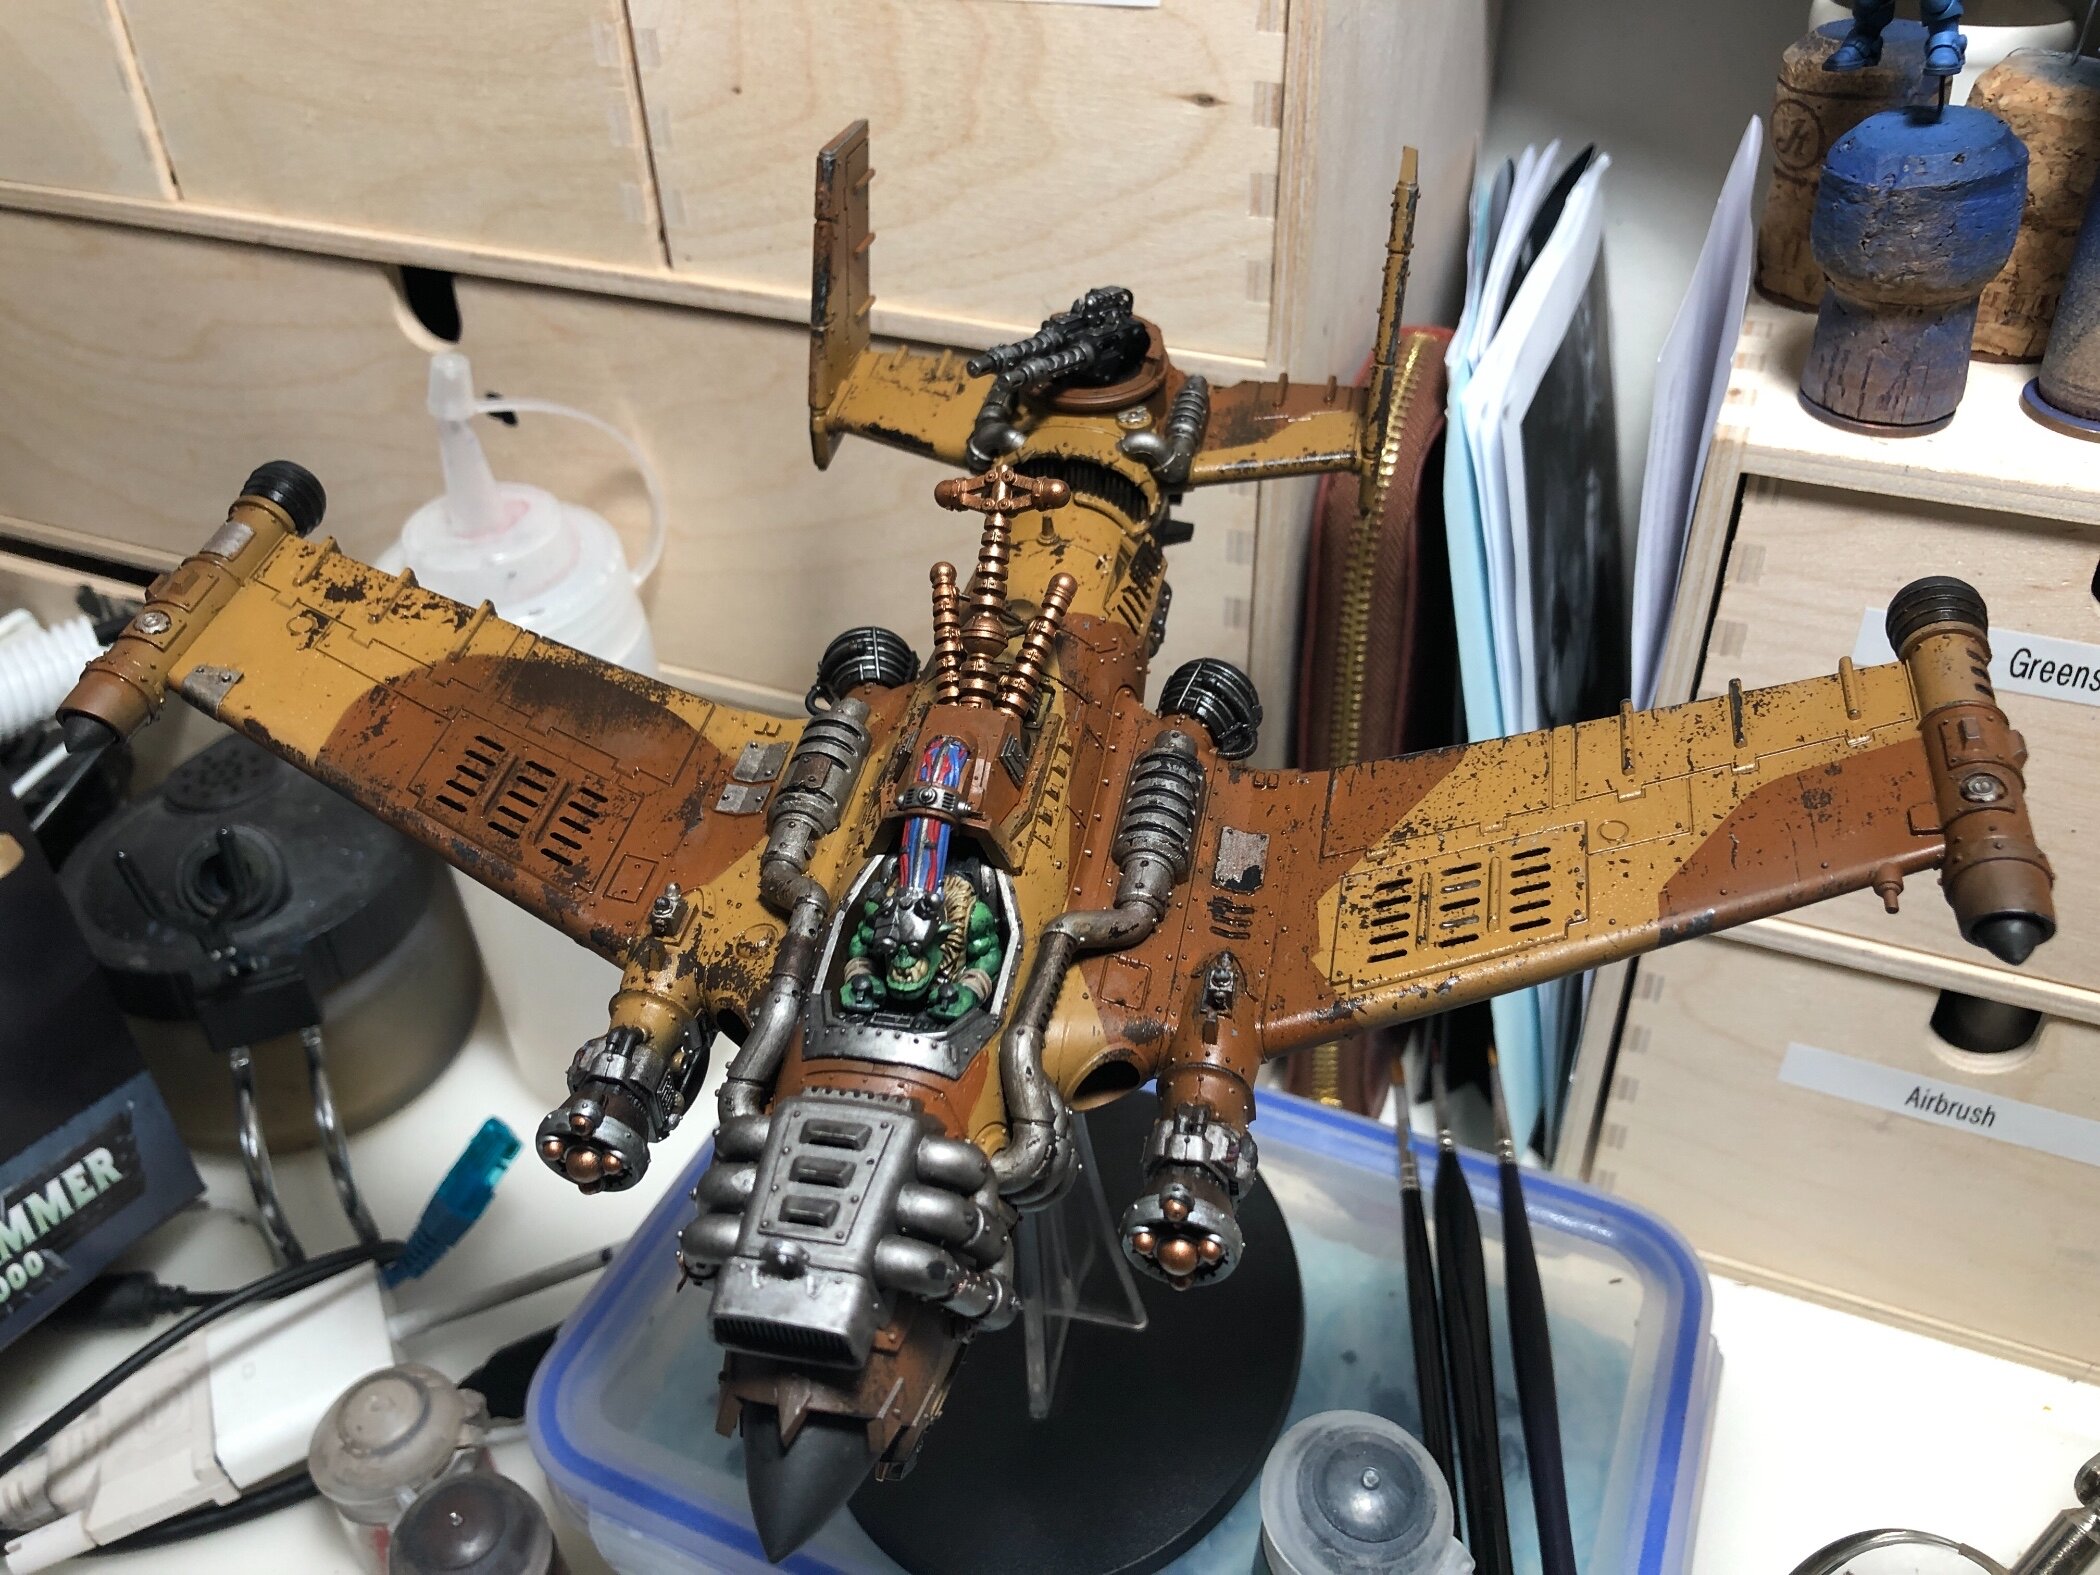
And thats where its up to so far. (Actually, thats where it was up to on the 19th Feb.) I'm going to do something with the base (probably involving the left over bits from the model and some skulls), but I've been playing around with oil paints, and it feels like some oil washes could add another nice layer of grunge.
But its tabletop ready, and I'm pretty pleased with how its looking - so I might just go back to some smaller-scale figures for now.